User Management
Access Level: Super Admin
Location: Top Menu → User Management OR Left Hand Side Menu → User Management
Scope: Organisation-wide user administration with building-level permission control
Overview
User Management allows Super Admins to create, edit, and manage all users within the organisation.
Users belong to the organisation and can be granted access to one or more buildings.
Permissions are controlled at building level, meaning a user’s access and capabilities may vary between locations.
From this section, you can:
Create and remove users
Assign building access
Configure booking permissions
Allocate WHS roles
Manage inductions (if enabled)
Import and export users in bulk
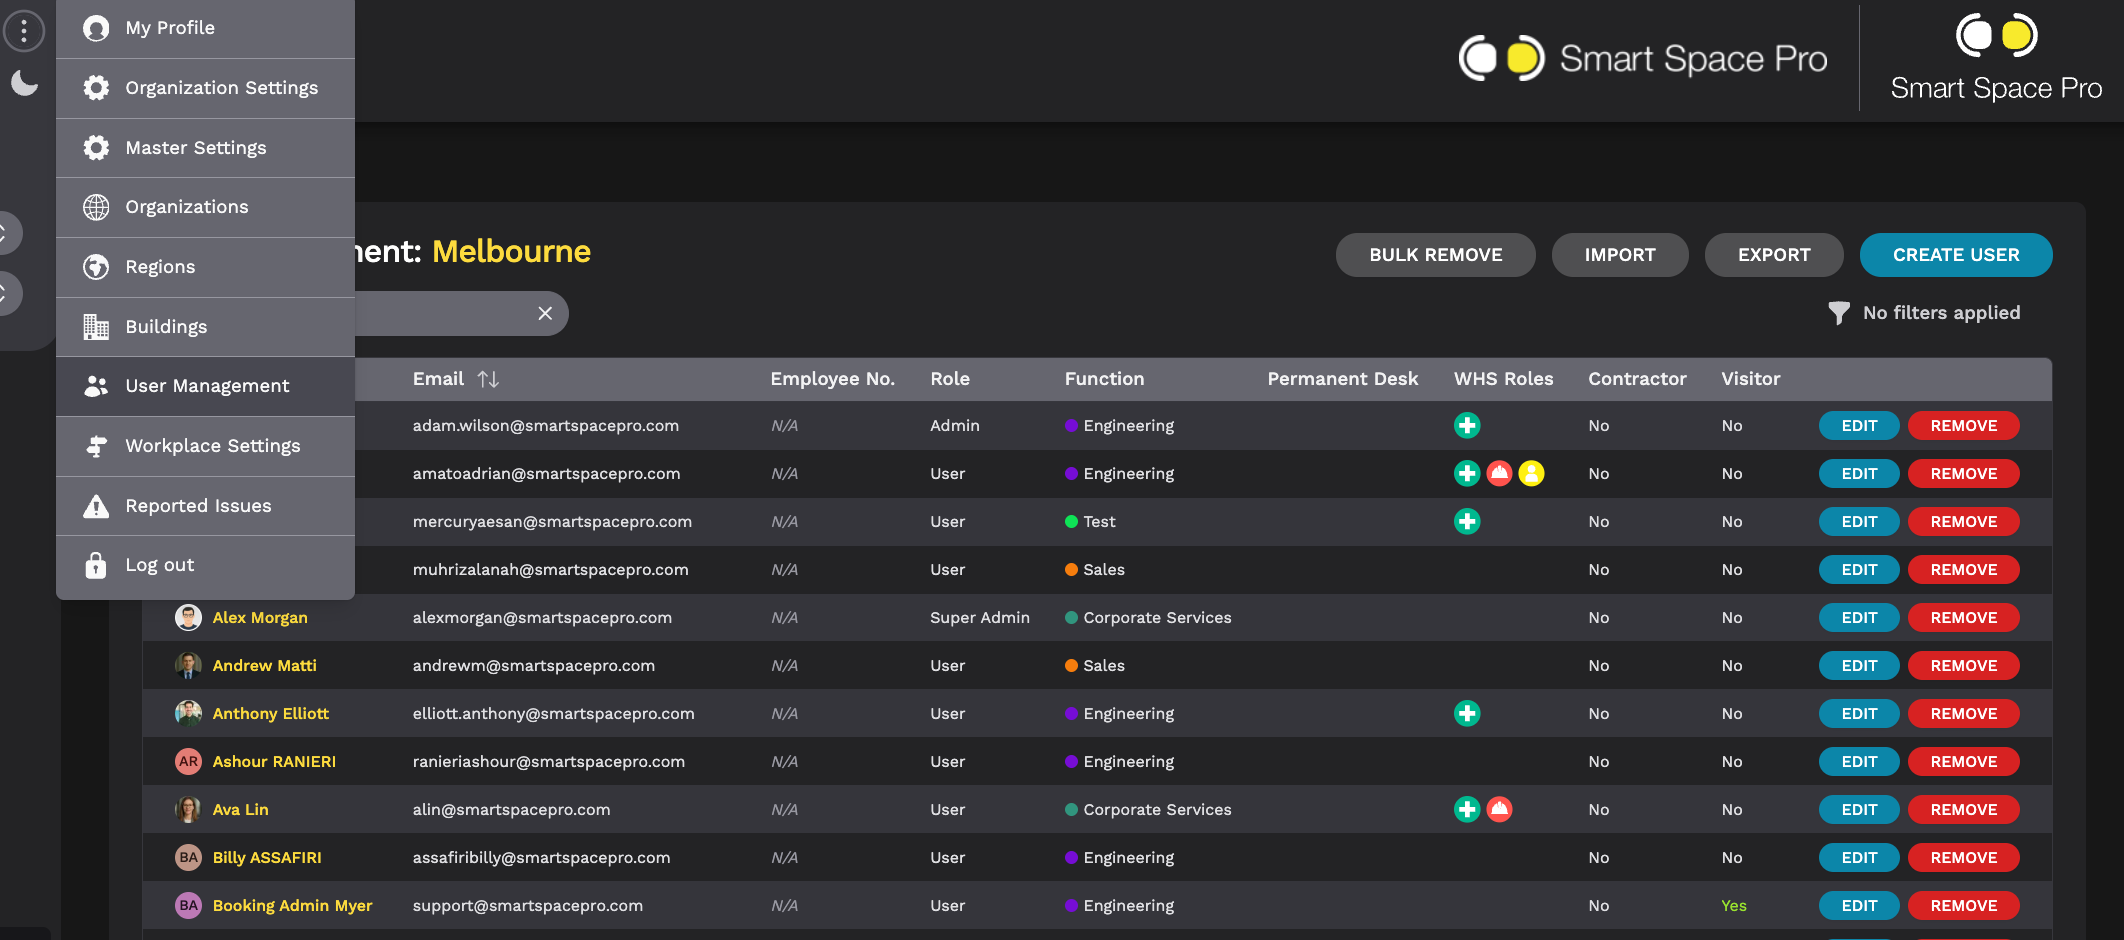
Viewing the User List
The User List displays all users across the organisation.
Each record includes:
Name
Email address
Employee number (if used)
System role (User, Admin, Super Admin)
Assigned function (per building)
Permanent desk status (per building)
WHS roles (if assigned)
Contractor or visitor status
You can:
Use the search field to locate users quickly
Sort columns for easier management
Apply filters to refine results
If no filters are applied, the full organisation list is displayed.
Creating a New User
To create a new user:
Navigate to Top Menu → User Management
Click Create User
Enter required user details:
Name
Email address
Employee number (if applicable)
Assign building access
Configure building-level permissions
Click Save
Once created, the user can access Smart Space Pro according to assigned permissions.
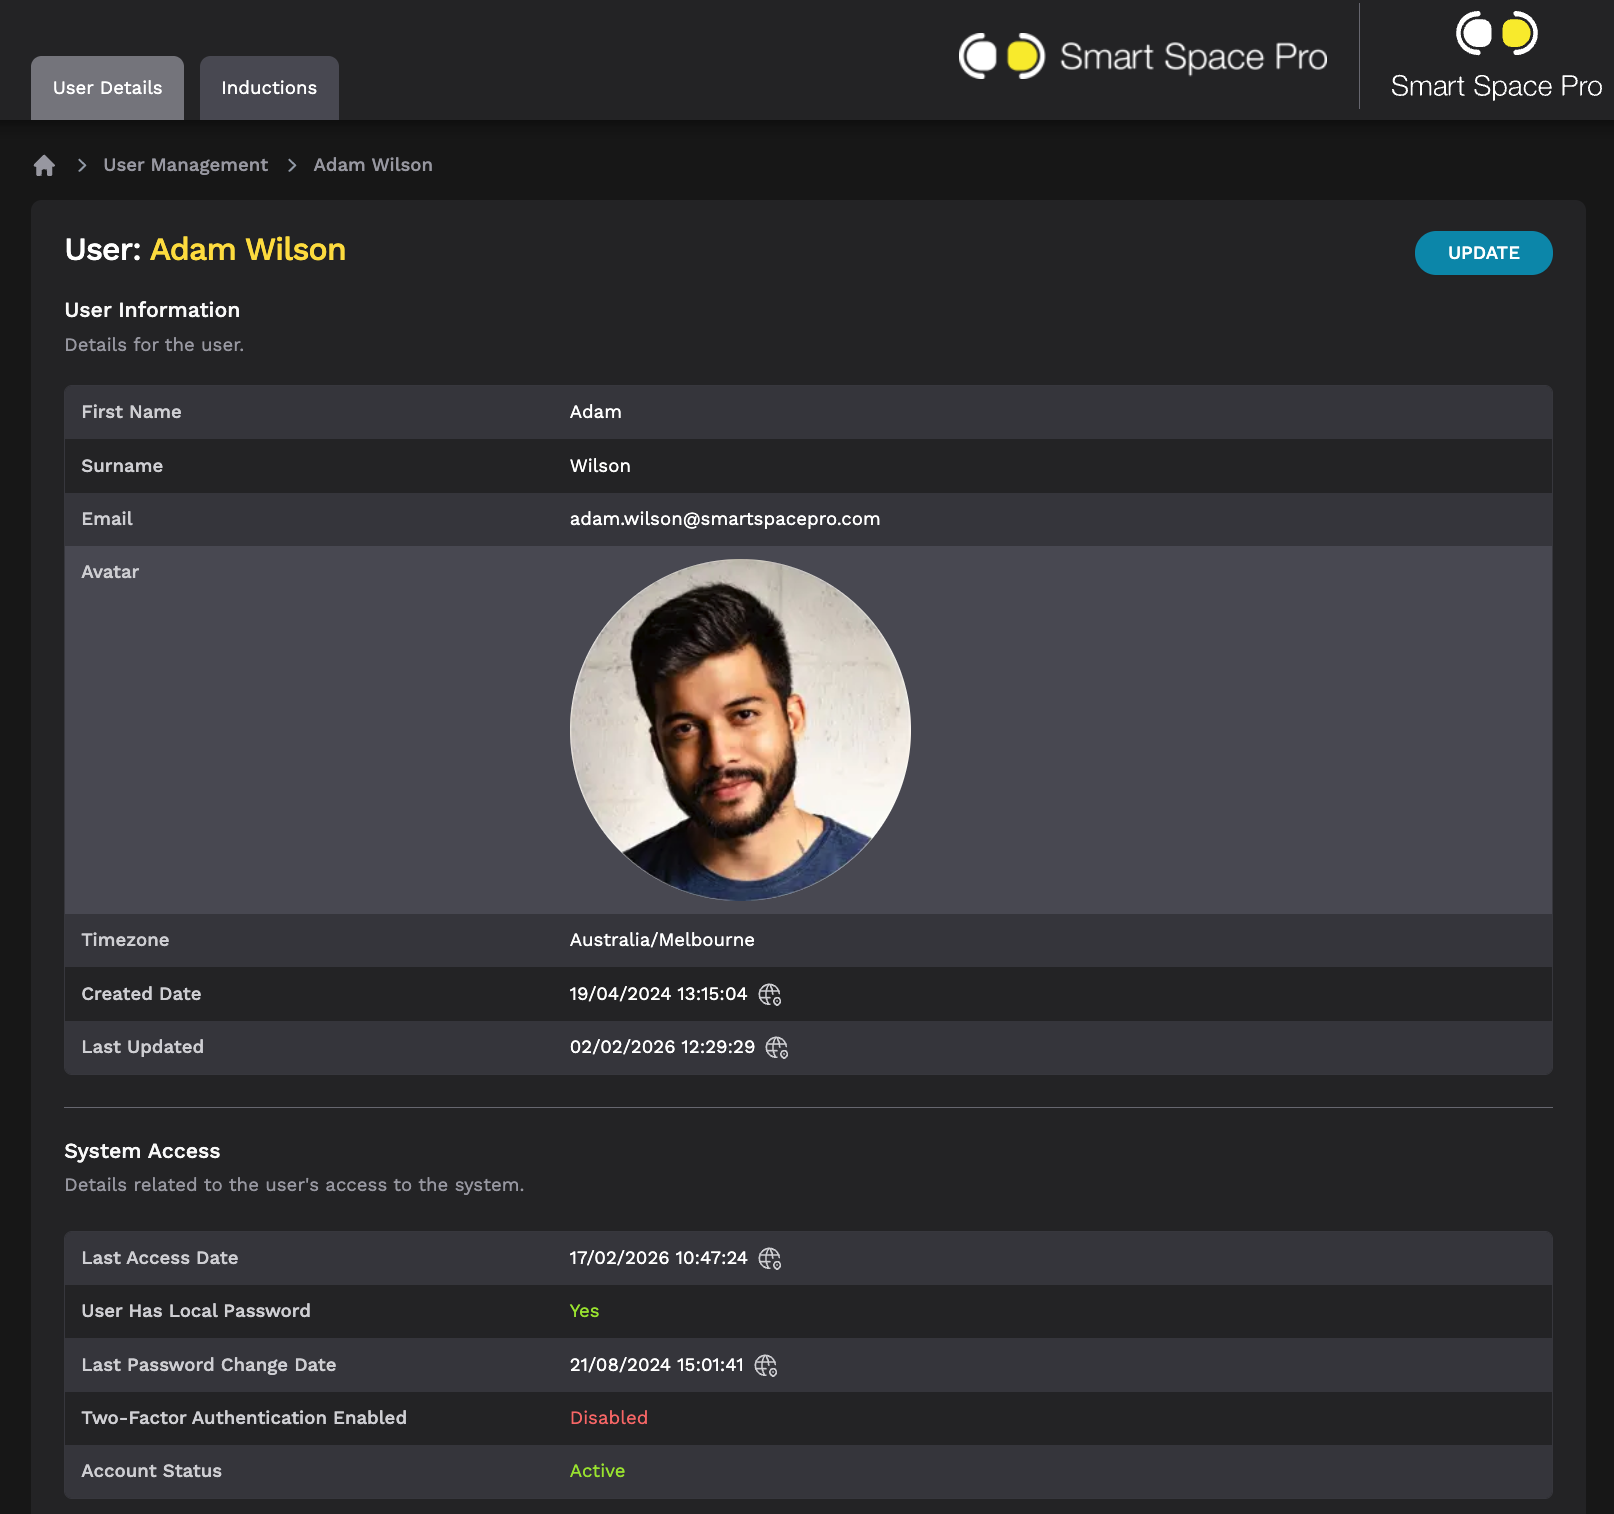
Editing an Existing User
To update a user:
Navigate to User Management
Locate the user in the list
Click Edit
Update required details:
Personal information
Building access
Permissions
Roles
Click Save
Changes apply immediately.
Removing a User
To remove a user from the organisation:
Navigate to User Management
Select the user
Click Remove
This removes access across all buildings.
For multiple users:
Use Bulk Remove to remove several users at once.
Removing users supports accurate licence and governance control.
Importing and Exporting Users
Import Users (Bulk Upload)
You can upload multiple users simultaneously.
To import:
Navigate to User Management
Click Import
Upload the required file format
Assign default building access and settings (if prompted)
Confirm upload
Importing supports efficient onboarding.
Export Users
To download a full user list:
Navigate to User Management
Click Export
This exports an organisation-wide user list for:
Record keeping
Governance review
Audit preparation
Managing Building Permissions
User permissions are assigned at building level.
This allows:
Different booking rights per building
Different WHS roles per building
Temporary building access where required
To update building permissions:
Navigate to User Management
Select the user
Open the relevant building profile
Configure:
Assigned function
Booking permissions
Role toggles
Click Save
Always ensure the correct building context is selected before updating permissions.
Booking Permissions
Booking permissions determine what a user can access within a building.
Available permissions may include:
Visitor desk booking
Restricted room booking
Group booking capability
Toggle permissions on or off as required.
Changes apply immediately after saving.
WHS Roles (Work Health & Safety)
Smart Space Pro includes built-in WHS roles that can be assigned at building level.
Default roles include:
Fire Warden
First Aid Officer
Peer Support Officer (configurable name)
These roles help staff identify workplace safety contacts quickly.
Assigning WHS Roles
To assign a WHS role:
Open the user profile
Navigate to Building Permissions
Toggle on the relevant WHS role
Click Save
WHS Role Visibility
Assigned WHS roles are visible to users via:
Find User (Web Portal)
Find Support (Mobile App)
This ensures visibility during emergency or support situations.
WHS Expiry & Automated Reminders (If Enabled)
If expiry tracking is enabled:
An expiry date must be entered when assigning the role
The system sends automated reminders prior to expiry
The role automatically switches off once expired
A new expiry date must be added to reinstate the role
This supports compliance and safety governance.
Customising WHS Roles
The Peer Support Officer role can be:
Renamed
Disabled
Customisation is managed by the Smart Space Pro team.
User Inductions (If Enabled)
If Workplace Inductions are enabled for your organisation, induction data can be accessed via the user profile.
From the user record, you can:
View current inductions
Review induction history
Monitor completion status
Induction tracking supports compliance and audit readiness.
Governance Best Practices
Assign building access carefully.
Remove users immediately upon offboarding.
Review user lists quarterly.
Monitor WHS expiry dates where applicable.
Use bulk import/export tools for efficient management.
User Management directly impacts system governance, compliance, and operational control.